
Effet de fumée avec gimp - comment ça marche
Dans Gimp, vous pouvez créer des effets de fumée impressionnants et les laisser fumer et fumer dans vos photos. Les instructions et une galerie d'images peuvent être trouvées ici.
Gimp: créez des effets de fumée avec le filtre IWarp
- Ouvrez Gimp et utilisez "Fichier" pour créer un nouveau document qui a à peu près la taille d'une colonne de fumée - un peu plus de deux fois la largeur. Remplissez ensuite l'arrière-plan de peinture blanche. De cette façon, vous pourrez mieux reconnaître la fumée plus tard pendant que vous y travaillez.
- Ajoutez maintenant un nouveau calque dans le menu des calques avec "Nouveau calque ...", sélectionnez "Transparence" comme type de remplissage du calque dans la boîte de dialogue et cliquez sur "OK".
- Définissez un gris foncé comme couleur de premier plan et tracez une ligne verticale épaisse avec l'outil pinceau. Utilisez ensuite une nuance de gris plus claire et un rayon de pinceau plus petit pour dessiner un deuxième trait (approximativement au milieu du premier). Il n'est pas important que vous travailliez très précisément, les traits peuvent facilement se tordre et se tordre.
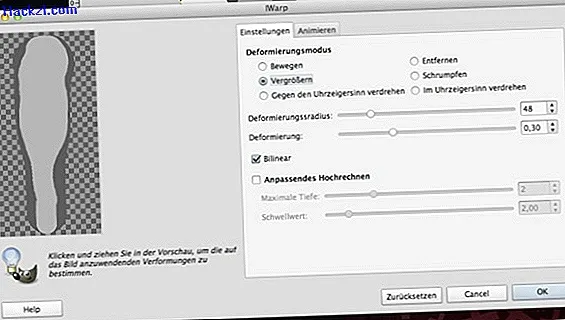
- Ouvrez maintenant le filtre "IWarp", que vous trouverez dans le menu "Filtres" sous "Filtres de distorsion". Sélectionnez le mode de déformation "Agrandir" et un rayon de déformation d'environ 30 à 60.
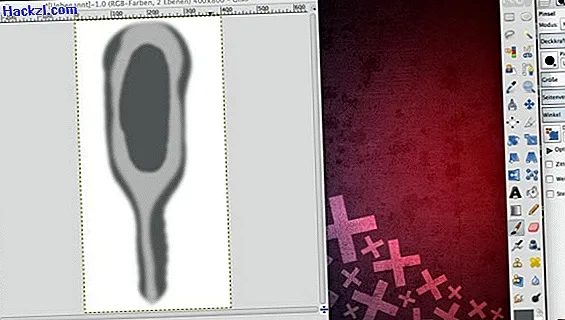
- Déplacez-vous maintenant dans la fenêtre d'aperçu avec le bouton de la souris enfoncé du milieu de votre trait vers son bord supérieur. Répétez le processus, si nécessaire, une ou deux fois jusqu'à ce que votre ligne soit beaucoup plus épaisse dans la moitié supérieure que dans la moitié inférieure.
- Basculez maintenant le mode de déformation sur "Rétrécir" et déplacez-vous dans la fenêtre d'aperçu avec le bouton de la souris enfoncé à partir du milieu de votre trait. Lorsque vous êtes satisfait du résultat, cliquez sur "OK".
- Utilisez le flou gaussien pour flouter votre image avec un rayon d'environ 10 à 20 pixels. Vous trouverez le "Flou gaussien" dans le menu "Filtre" sous "Flou".
- Utilisez ensuite la pipette pour sélectionner la teinte de gris plus foncée de votre image comme couleur de premier plan et dessinez un ovale dans la zone supérieure de votre trait avec le pinceau. Encore une fois, il n'est pas important que vous travailliez particulièrement précisément.
- Dans le menu "Filtre", cliquez sur "Répéter le flou gaussien" pour adoucir à nouveau votre image avec les valeurs définies précédemment.
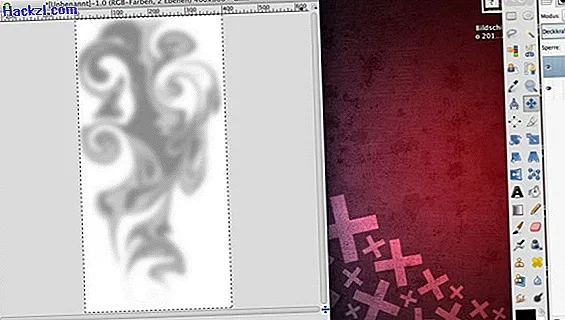
- Ouvrez à nouveau le filtre "IWarp", mais sélectionnez cette fois "Twist antihoraire" comme mode de déformation. Dans la fenêtre d'aperçu, maintenez le bouton de la souris enfoncé et déplacez votre trait de haut en bas plusieurs fois jusqu'à ce que les tourbillons ressemblent à un nuage de fumée. Cliquez ensuite sur "OK".
- Maintenant, appliquez à nouveau le flou gaussien en définissant un rayon de 20 à 30 pixels.
- Vous pouvez maintenant copier le calque sur lequel se trouve votre fumée et le coller dans une autre image. Le tout semble encore plus réaliste si vous réduisez un peu l'opacité du calque avec la fumée dans le nouveau document. Vous pouvez relire les différentes étapes dans notre galerie de photos.

Apprenez à créer un ciel étoilé brillant avec Gimp dans cette astuce pratique.
Dernières vidéos
Créez un calque transparent sur un fond blanc.

Tracez deux lignes verticales d'épaisseur différente en utilisant différentes nuances de gris.

Utilisez le filtre IWarp dans le mode de déformation "agrandir" et "réduire" pour définir le contour approximatif de votre nuage de fumée.
Modifiez le résultat intermédiaire avec le flou gaussien.

Dessinez un ovale gris foncé en haut de vos traits et appliquez à nouveau le flou gaussien.
Utilisez le filtre IWarp pour insérer des tourbillons en mode de déformation "rotation anti-horaire".

Enfin, adoucissez à nouveau votre fumée.
Si vous souhaitez coller le nuage de fumée dans une autre image, réduisez légèrement l'opacité du calque qui contient la fumée.
